
ISO tends to be the least glamorous member of the Exposure Triangle. Aperture and Shutter Speed get all the creative glory while ISO quietly handles the grunt work in the background.
ISO is definitely a middle child.
In our previous metaphor, we talked about how Aperture was the size of the tap, shutter speed was how long the tap was open, and ISO is how big the bucket you're filling is. The goal is to fill the bucket with the exact amount of water you need.
Let me preface this by saying this doesn't matter. Not even a little bit. That said, the International Organization for Standardization was the group that standardized how film sensitivity was measured way back when. The name itself comes from the Greek word *isos*, meaning “equal.” That last part is actually pretty cool.
What ISO Actually Does
In film, ISO (or ASA back then) literally described how light-sensitive the film stock was. In digital cameras, ISO does something slightly different: it amplifies the light your sensor captures.
Think of it like turning up the volume on a quiet recording—you hear more, but you also hear any imperfections, like the hiss of a tape or the hum of an amplifier. As you turn up the sound, you notice more distracting imperfections.
In simple terms, ISO determines how sensitive your camera is to light. At lower ISOs, you'll need longer shutterspeeds and/or wider apertures to balance the exposure. Conversely, higher ISOs enable you to use faster shutter speeds and/or smaller apertures, but the tradeoff is more noise in your images.
The Trade-Off: Brightness vs Noise
The higher the ISO, the brighter your photo... but at the cost of clarity.
Every time you double ISO (say from 100 → 200, 400 → 800, etc.), your camera needs half as much light for the same exposure. But doubling ISO also doubles the visible noise in your image.
These aren't absolute truths, but consider the following ISO values as starting points for common shooting scenarios:
- ISO 100–200: Bright daylight — minimal noise — great for landscapes and studio light
- ISO 400–800: Moderate light — low noise — indoors or cloudy days
- ISO 1600–3200:Low light — noticeable noise — concerts, night streets
- ISO 6400+: Very low light — heavy noise — astro or emergencies only
Noise shows up as specled grain, especially in shadows or solid color areas. Newer sensors handle this better, but it's still a trade-off every photographer faces.
ISO and the Exposure Triangle
ISO doesn't work alone. I like to think of it as the "pressure release valve" of the exposure triangle.
- Aperture controls how much light gets in
- Shutter speed controls how long the light hits the sensor
- ISO controls how sensitive the sensor is to light
When you can't open your aperture any wider or slow your shutter any longer, those are good signals that you should consider raising ISO.
Practical Examples
Let's take a look at some boring, albeit productive examples of changing ISO in a practical scenario: low light photography.
The following images were all shot at the same aperture (f/6.7 on the Voigtlander Nokton 35mm f/1.2) with differing shutterspeeds and ISO values from 6400 down to 400. Notice how the shutterspeed changes the effect of the photo between images, and then note the extreme crops of how ISO 6400 differs from ISO 400:
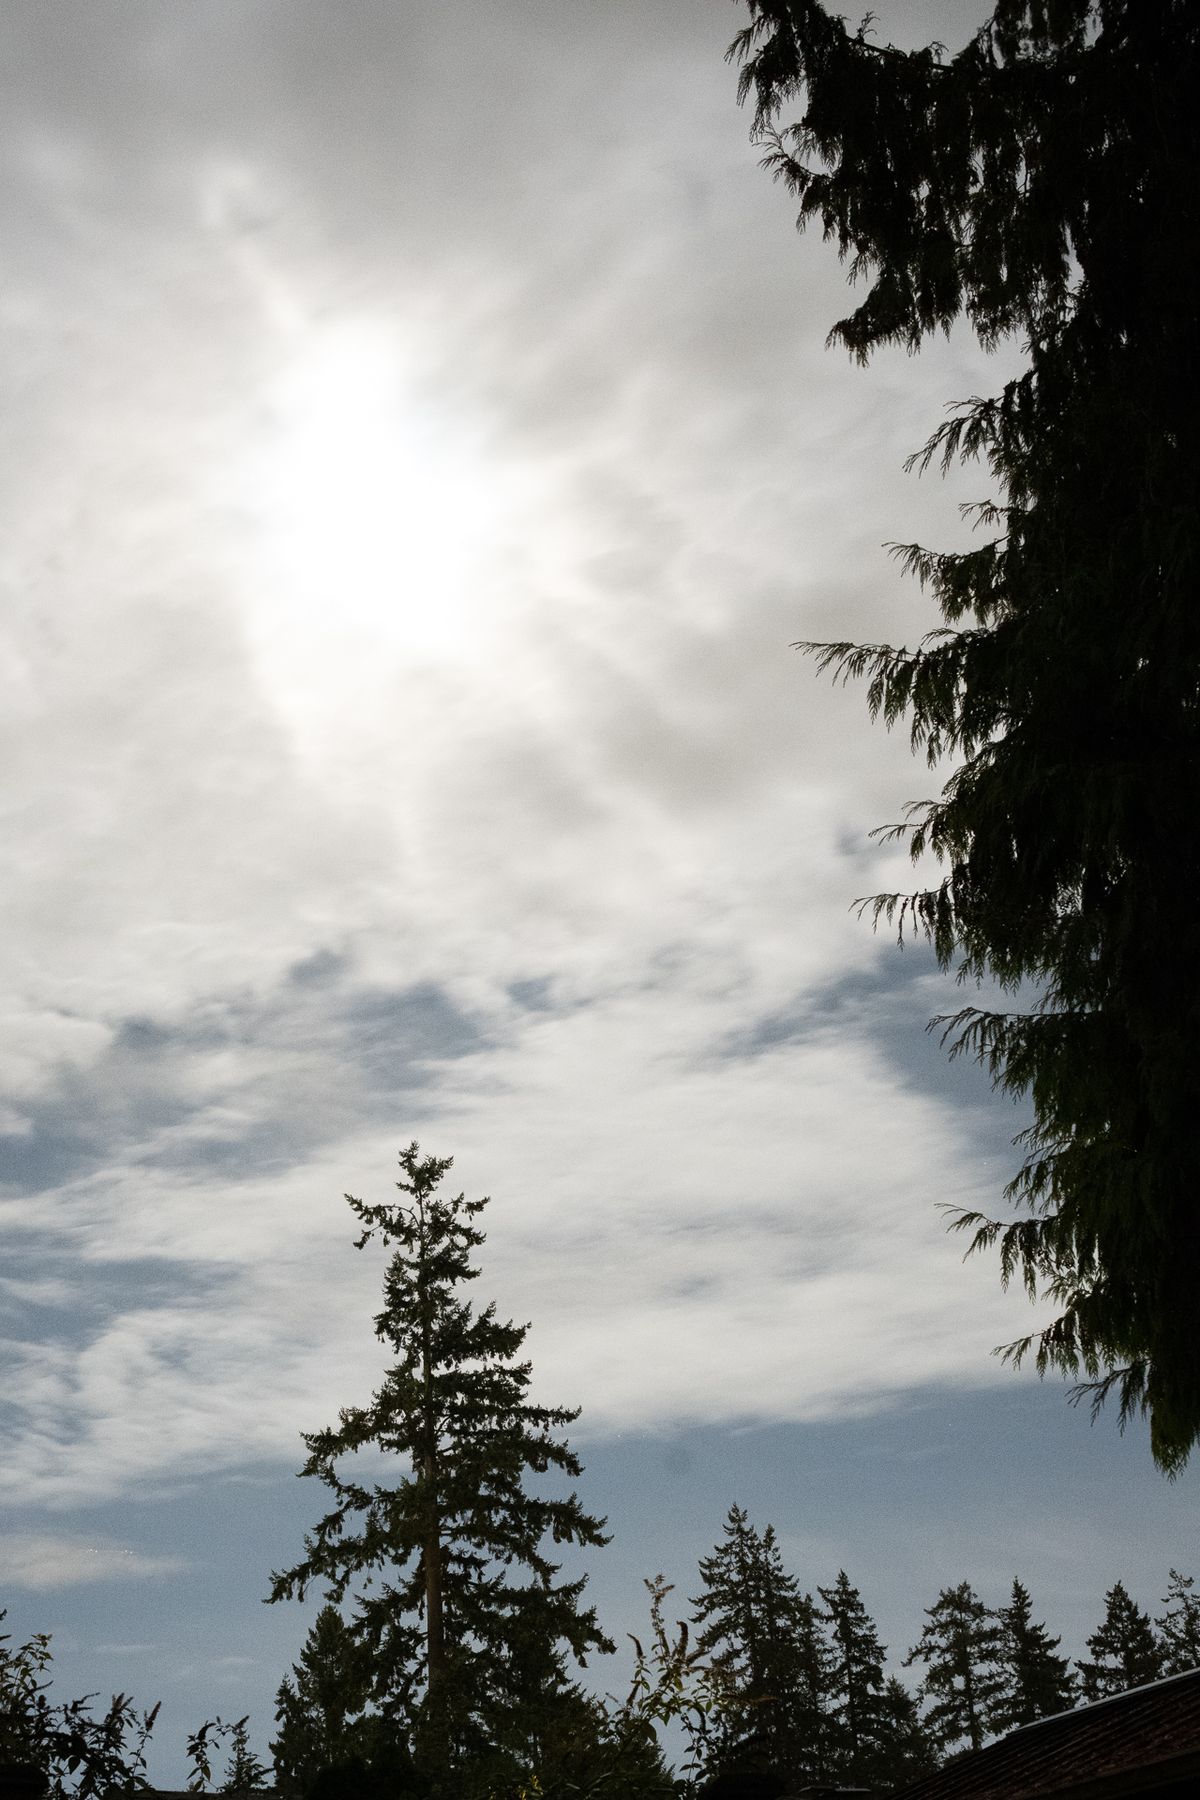
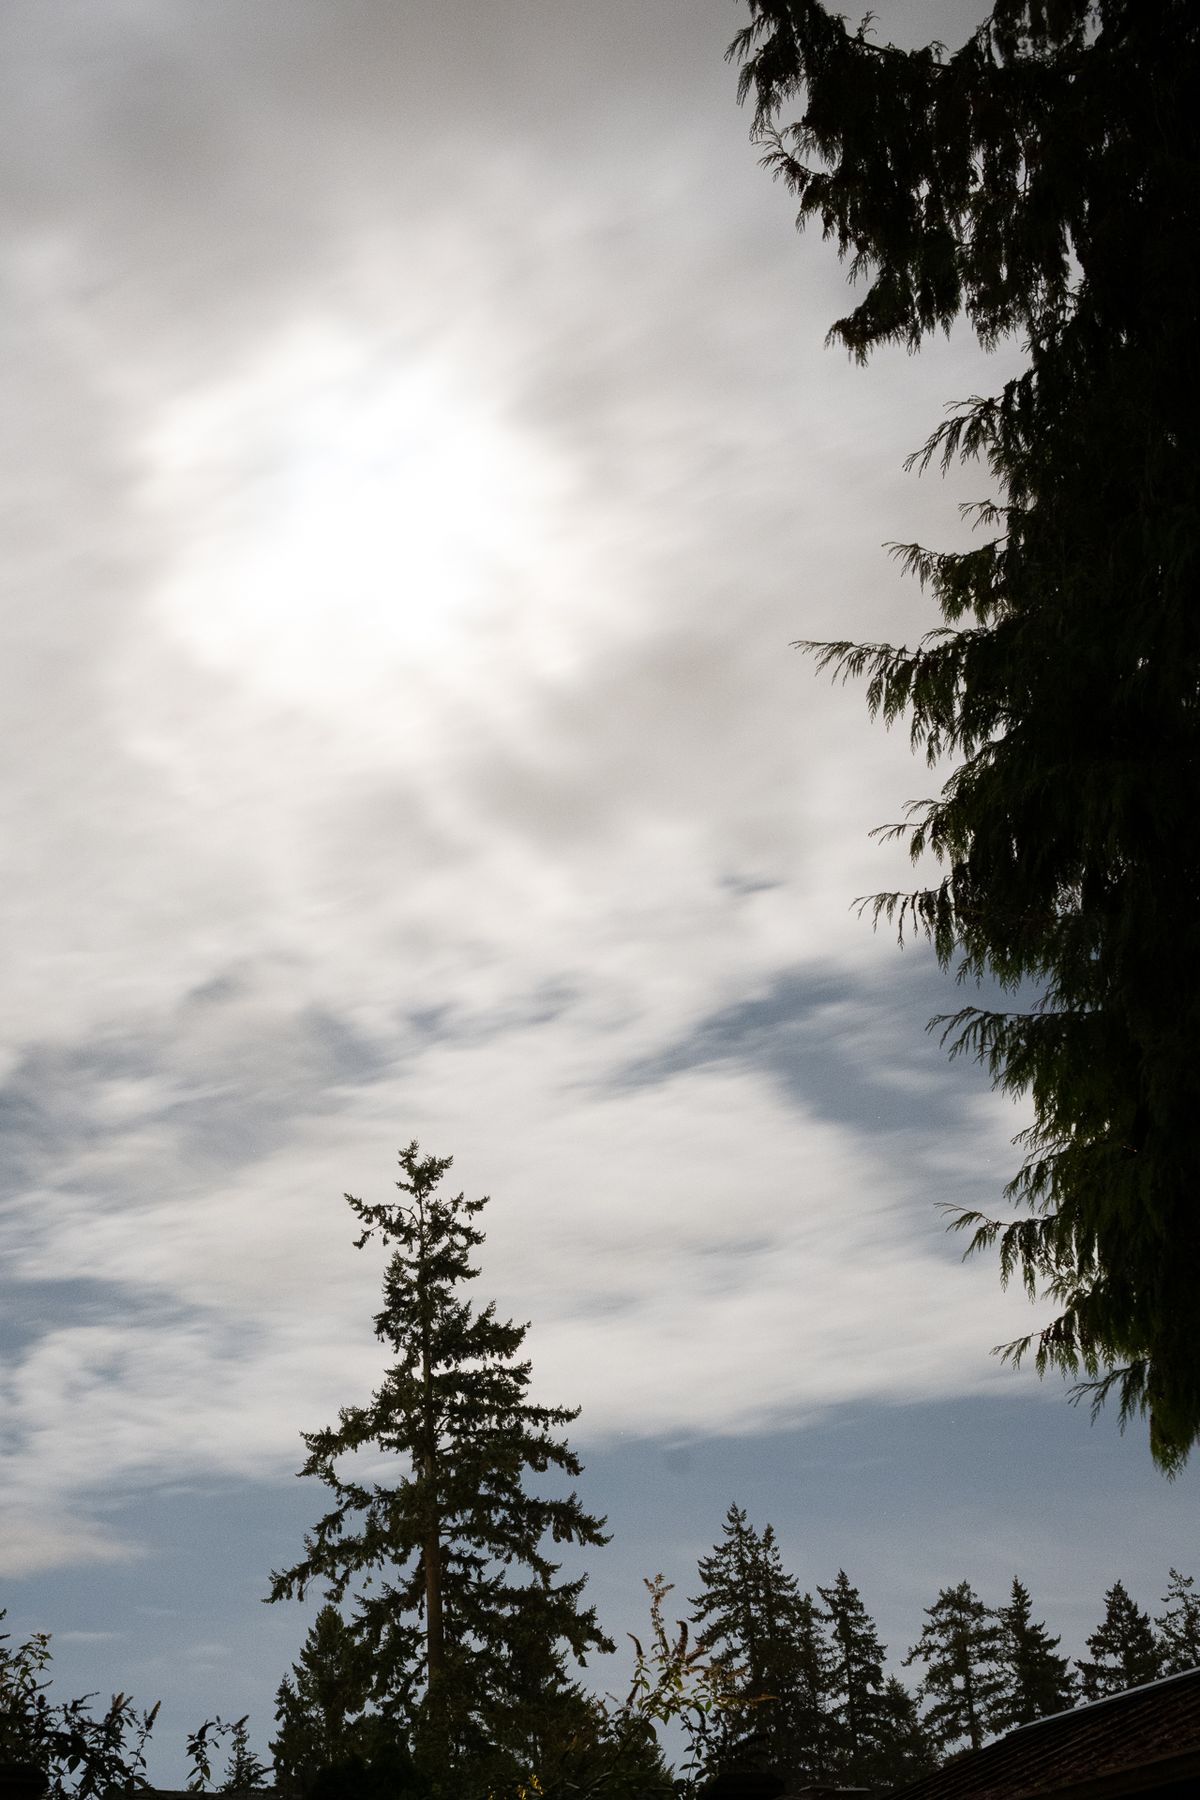
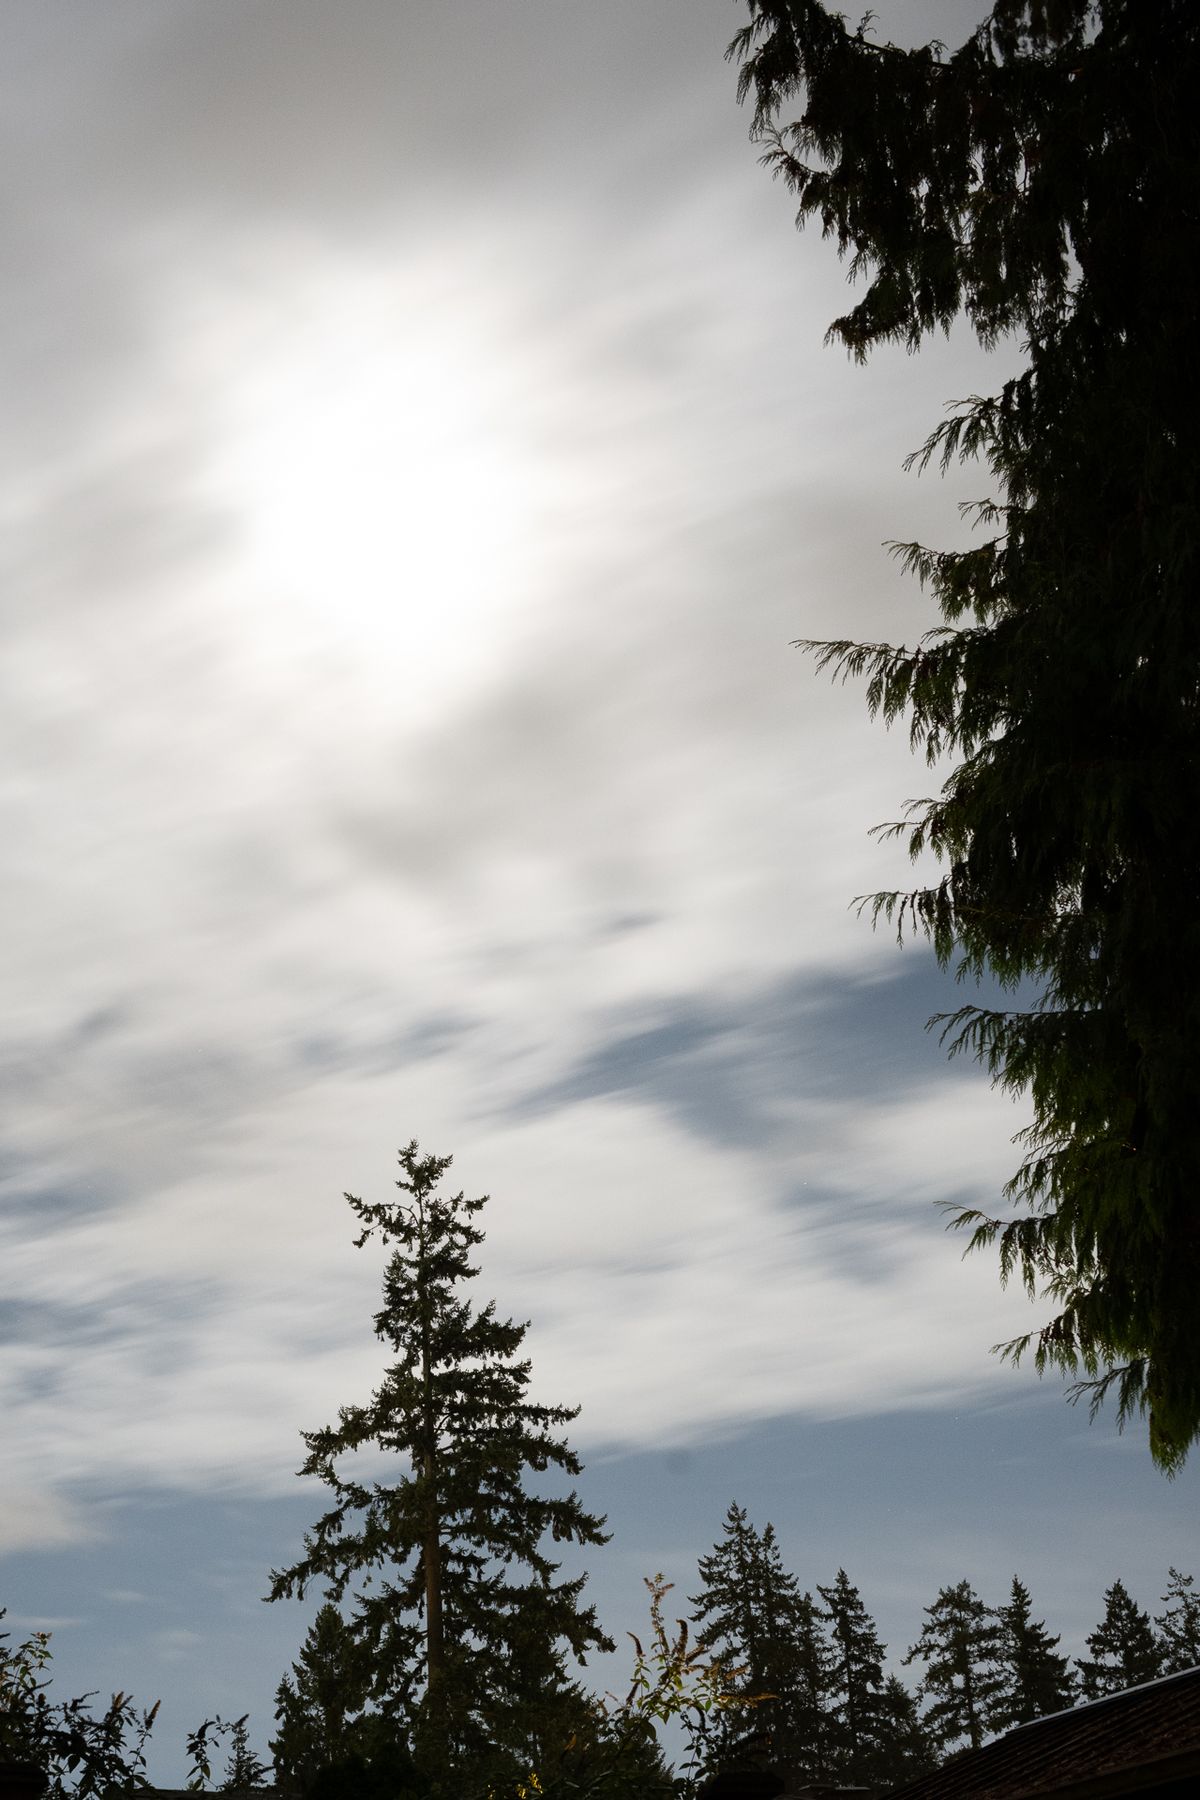
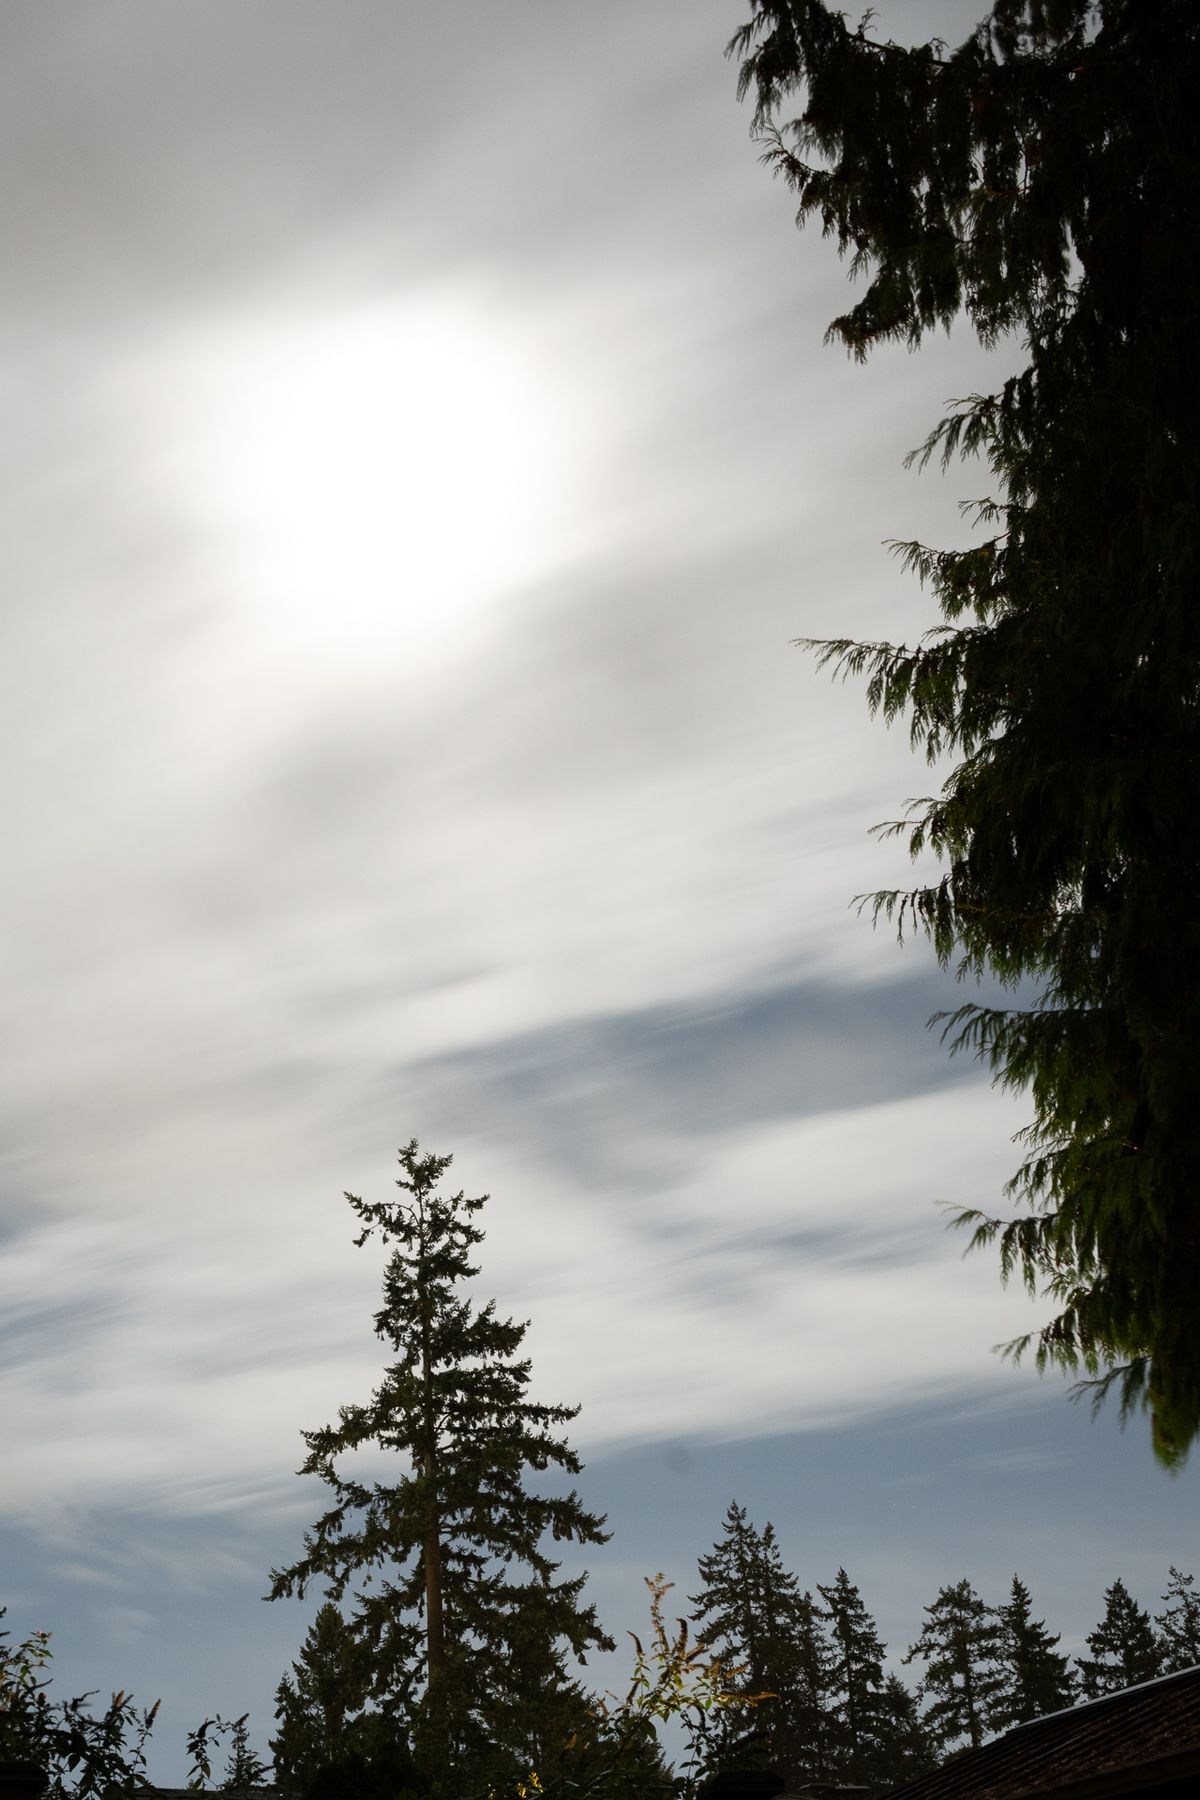
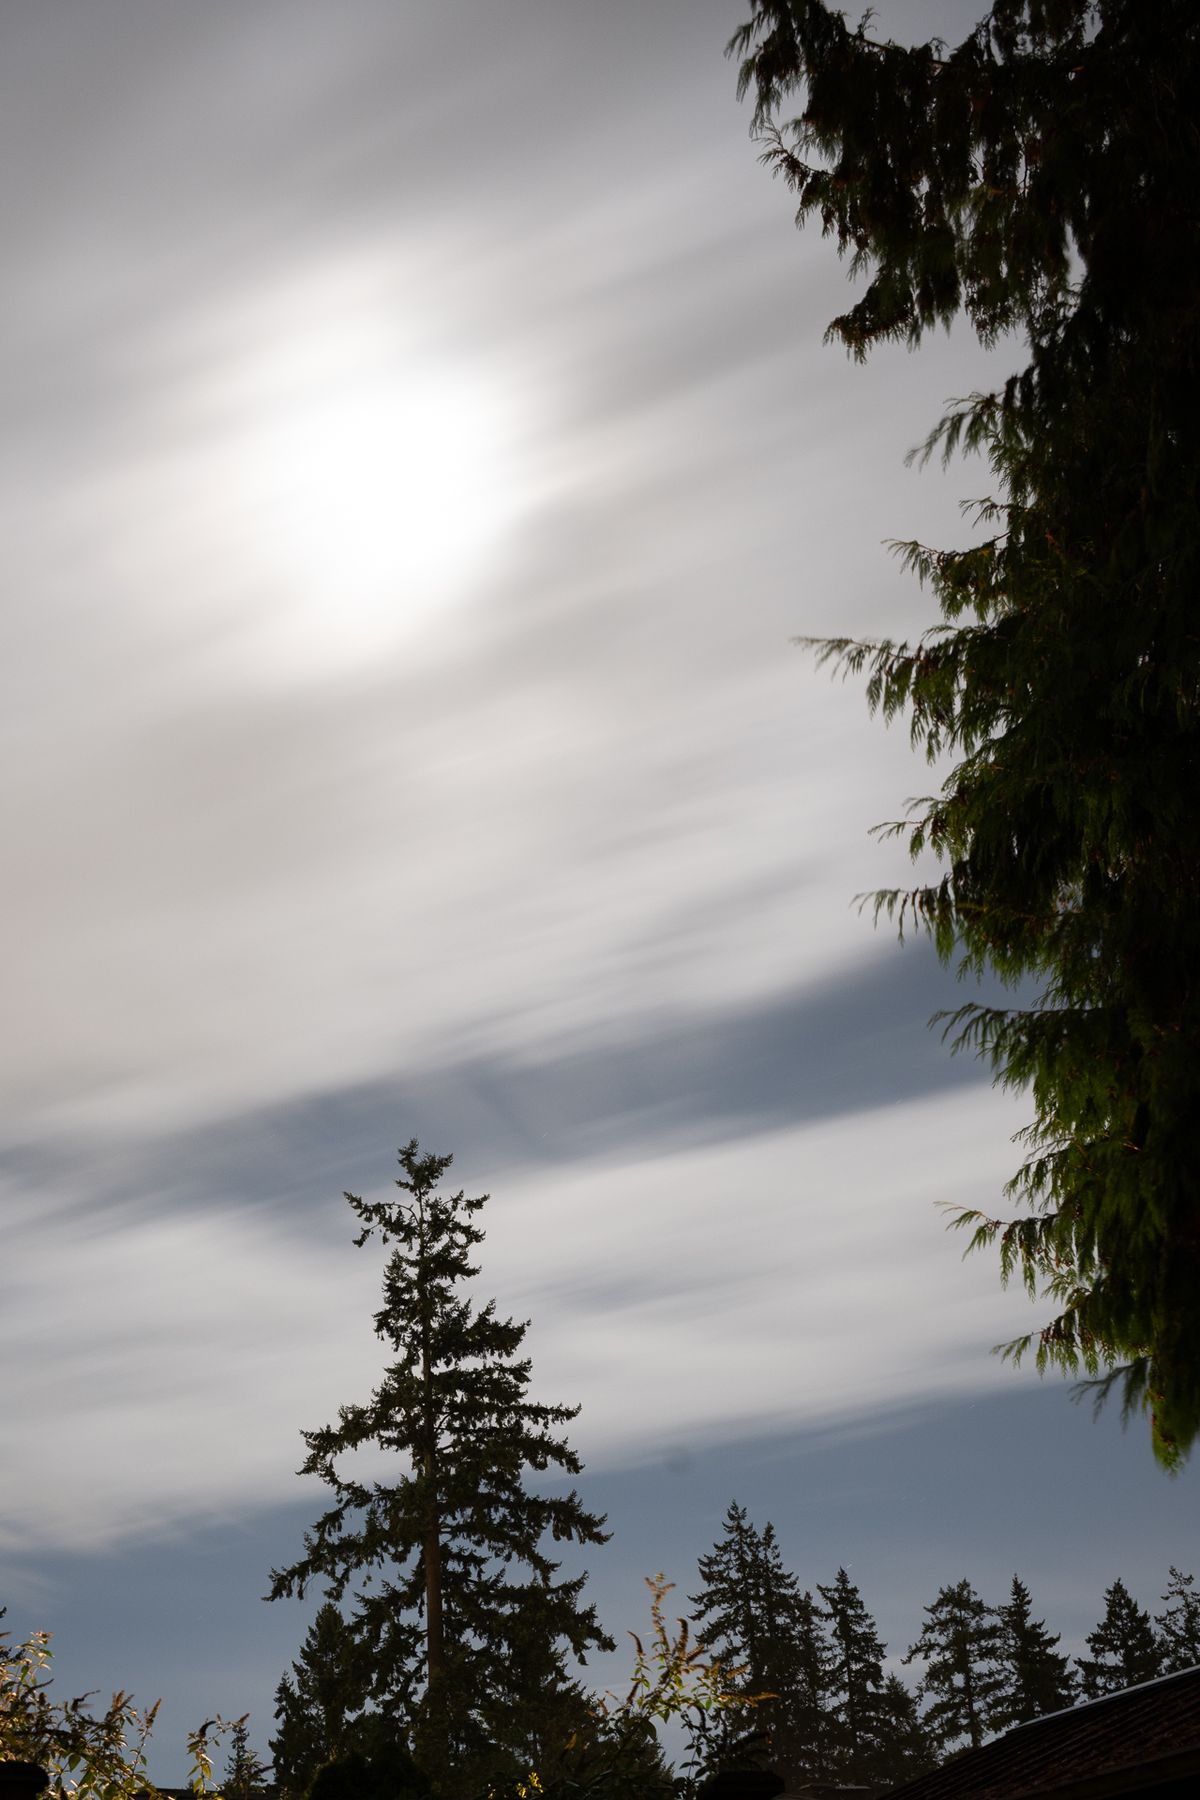
In short, the noise decreases noticeably as ISO decreases, but ISO 6400 is perfectly useable without close inspection and without cropping in you may not even notice the excess noise at all (hold that thought). You might dismiss the noise as "film grain," or a natural byproduct of shooting in lower light. What you'll also notice right away is how shutterspeed affects the motions of the clouds. In most astrophotography settings, you'd want to freeze the clouds in place, so you might decide that a higher ISO is acceptable to achieve that image. You might also decide that low noise is more important than motion, or that motion somehow makes the shot more interesting. Neither opinion is wrong. They're just opinions.
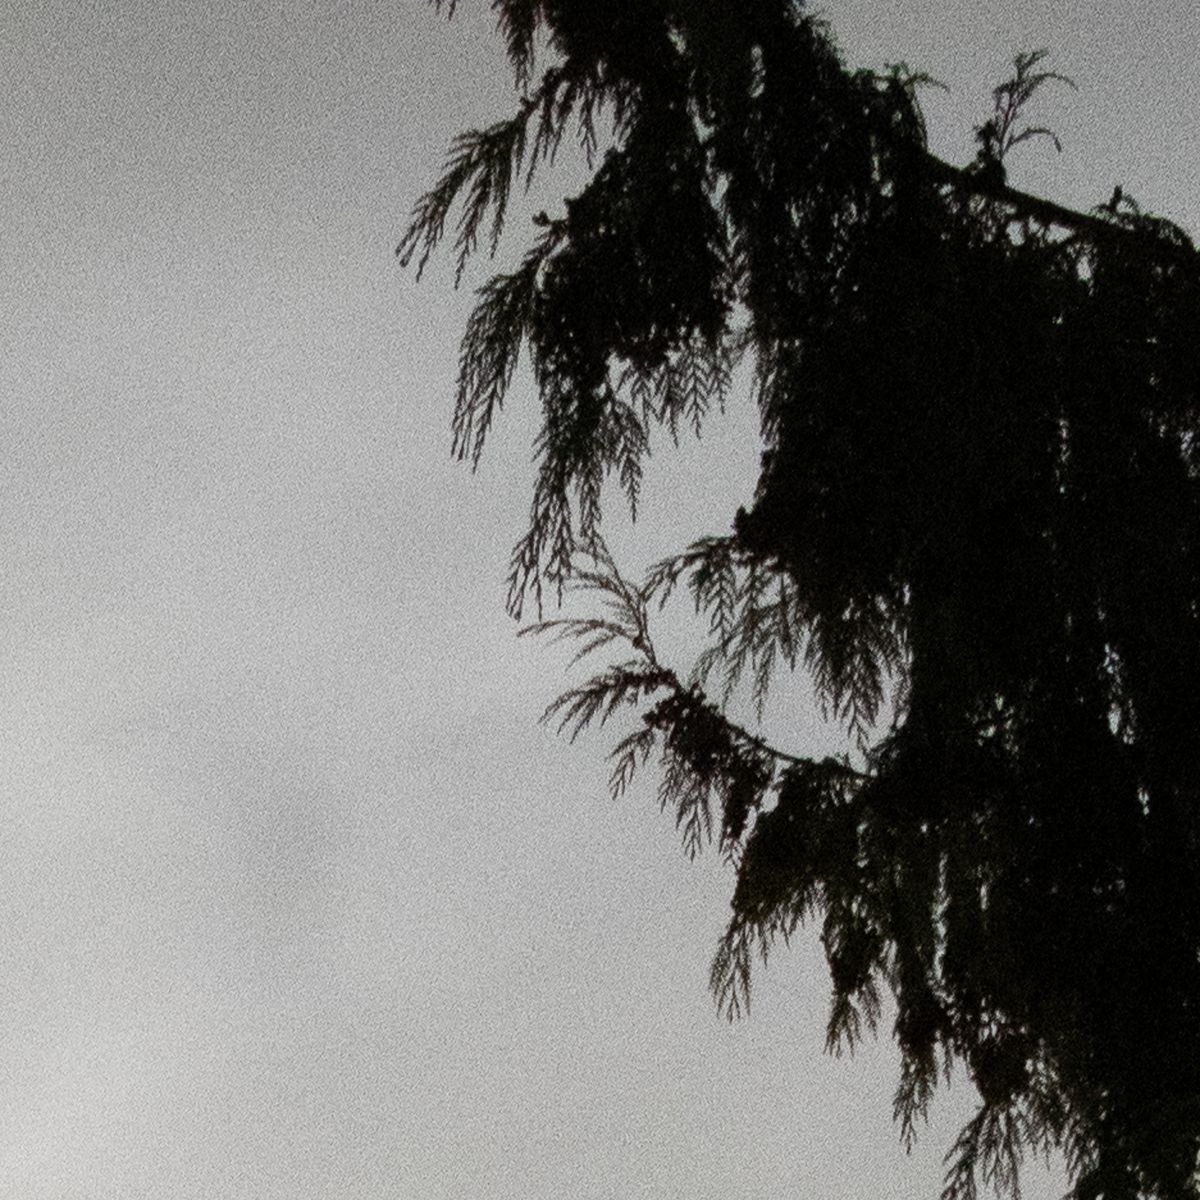
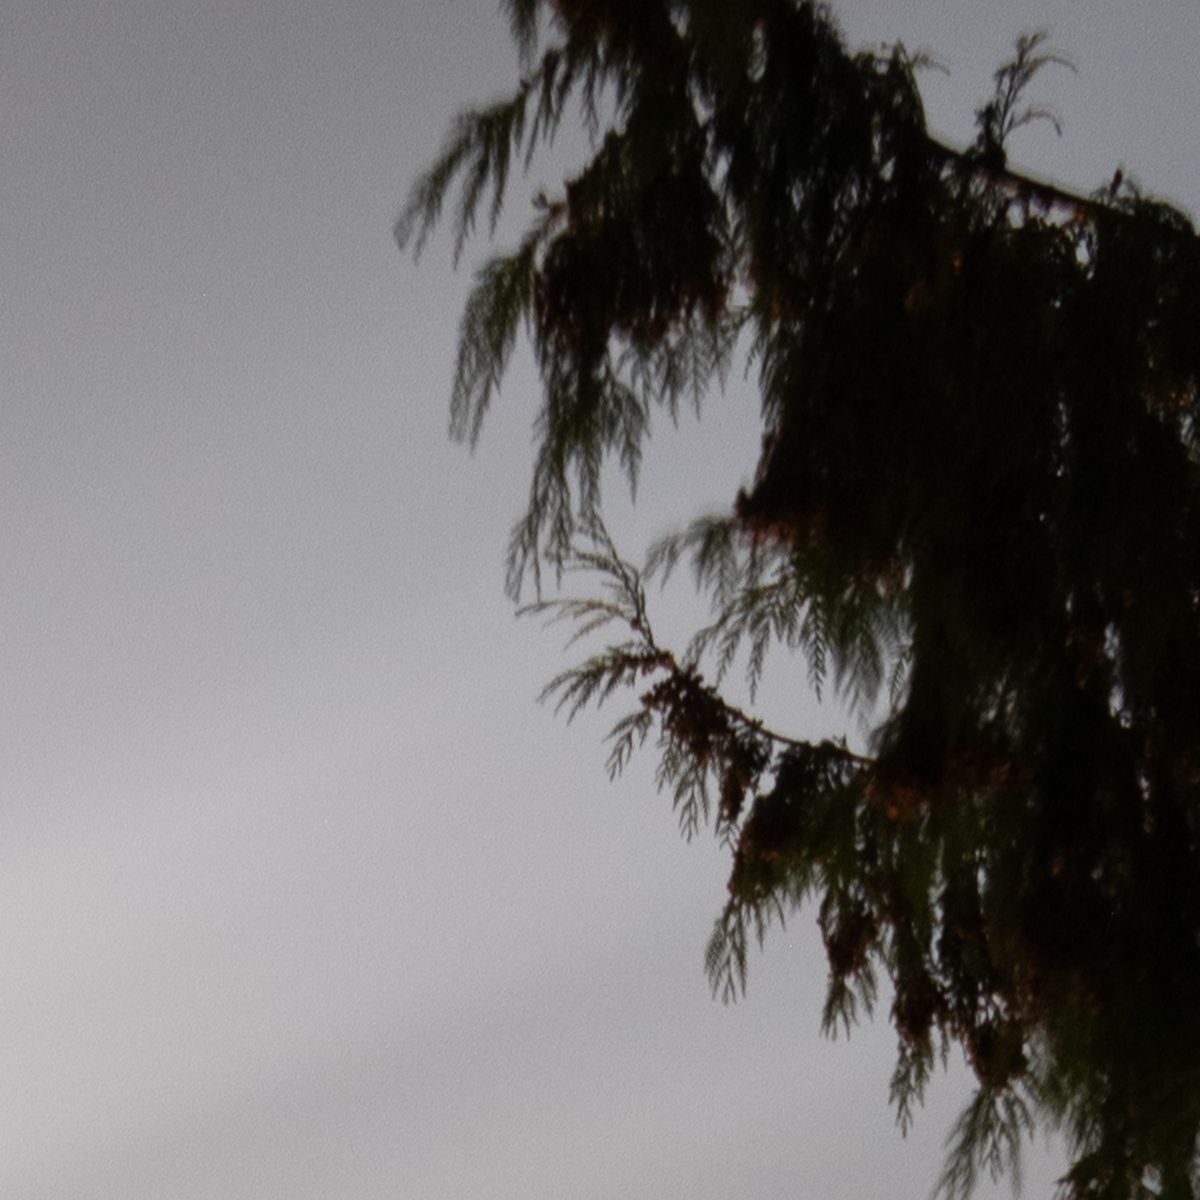
Less debatable, though, is the effect higher ISOs can have on images as you zoom into the details. From the same crop of above images, the below show a close-up crop at ISO 6400 and ISO 400. Obviously ISO 6400 has more noise, less motion blur in the clouds.
Which is correct?
Which is creatively correct?
Both. Neither. Ultimately it's a subjective matter of taste, and you can't have taste until you understand what drives each image.
Common Beginner Mistakes
- Forgetting to reset ISO → There's nothing worse than shooting at high ISO for a session, shooting another, and then realizing when you upload your photos for editing all your images are significantly more noisy than they needed to be. Get in the habit early of making conscious choices of what ISO to use every time you pick up your camera.
- Trusting Auto ISO too much → This is a great mode to use and many cameras let you set a ceiling so the ISO doesn't go higher than you want. However, letting the camera decide for you requires surrendering an aspect of creative control. Use Auto ISO at your own pace, but if you want to learn faster, skip it.
- Thinking higher ISO range = better low-light camera → This is pure marketing. There are many cameras that have a ridiculously high ISO range, but other factors, such as sensor size and manufacturer, can have an outsized impact on how a given camera handles noise. You can get perfectly usable images well north of 6400 ISO on many newer cameras... But just because you can
- Overcorrecting in editing → Using a heavy hand on noise reduction can still make your images look soft. As you're probably beginning to notice, much of photography is about balance and avoiding extremes.
Final Thoughts
ISO isn't about perfection—it's about balance. It's the tool that lets you shoot in imperfect light and still tell the story.
A little noise isn't a failure. Sometimes it can even impart an old school "film grain" look. If it ever comes down to taking a blurry photo or a noisy photo, lean towards a sharp, albeit noisy, photo.
Head into a low-lit room with a single lamp.
Set your camera to manual mode, f/2.8, 1/60s, ISO 100. Take a shot.
Then increase ISO one stop at a time—200, 400, 800, and so on—until the photo looks properly exposed.
Zoom in and notice how detail and noise shift at each level.
That’s the real-world difference ISO makes. Zoom out and take stock of how noise changes as ISO increases. Make a mental note about where your images from your current camera become "unusable."
That's a very subjective determination, but can help inform how high you're willing to raise ISO when shooting with that particular camera.